I was reminded of the 80/20 rule yesterday as I was briefing my team on a project I needed them to work on. Ok, actually I was telling my kids about this, but it was still for a project.
In this case, I was pointing out that 80% of the effort for a project often is used on completing only 20% of the project. Researching this a bit further, there’s an actual name for this rule: the Pareto Principle. We’ve probably all come across this rule or some variation of it in our lives.
While not exactly the situation here, the point I was trying to make with them is that sometimes when fixing a simple problem, the issues and work that spin off easily take 10 times as much time and effort as the original problem.
In this specific case, I was asking them to do what was essentially an annoying and dirty job, clean up some edges to sheetrock before I finally re-enclosed a portion of the basement ceiling. They started later in the day than I would have preferred, but honestly, as this project has been sitting on hold for a few months, a couple more hours didn’t really matter. That said, I think the actual work took them longer than they thought it would.
So what prompted yesterday’s work was a small leak that I fixed over a year ago.
Over the years, we had noticed a slight leak in the downstairs bathroom. It wasn’t always apparent, but it was slowly getting worse. Essentially water was soaking into the sheetrock and walls of the finished portion of our basement.
Now, I’m a fairly handy guy, I spent several summers in high school and a bit of college working for my father in the construction trade. While he’d point out my finish work needed more work, in general, if it’s involved in residential construction, I’ve done it and I can feel comfortable doing it. But, besides learning how to use the tools, I also learned an important lesson: no project is ever as simple as it appears. This is actually one reason I hate starting home-improvement projects. I know that it’s going to turn into a lot more work than it originally looks like. It isn’t exactly the 80/20 rule, but I’m reminded of it. So let me dive a bit into what was and still is involved in fixing this simple leak.
First, I had to identify where it was. From lots of inspection, guesswork and experience, I guessed in the wall behind the tiles. Ok, so that means, rip out the tiles and the plaster and lathe underneath. That’s simple enough, and honestly fun, albeit it dusty.
Second, once the leak was found, replace the plumbing. With modern Pex plumbing, that’s actually the quickest part of the work. So yes, actually FIXING the leak, took maybe an hour. I will note I also took the opportunity to move the showerhead up by about 9″. One thing I hate are low showerheads!
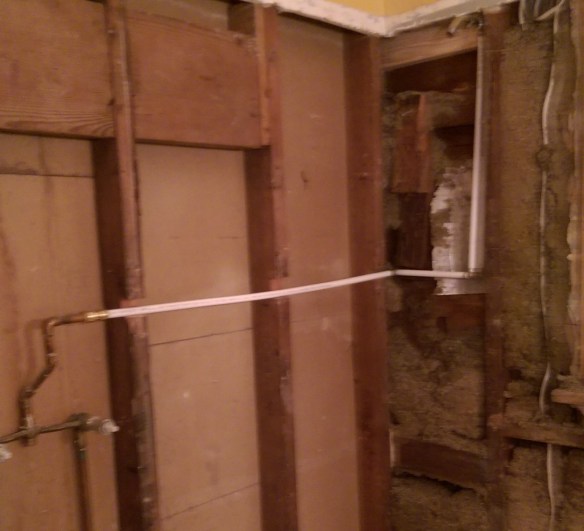
New Pex plumbing to showerhead
But, hey, while I’m in here, I might as well run the wiring for a fan for the bathroom because it’s always needed one. And given a weird quirk of construction in this house, the easiest way is to run it into the long wall of the bathtub/shower, then over to the outside wall and then up to the approximate location of where the fan will go. So there’s another hour or two for a project to was started to fix a leak.
Oh and while I’m at it, let me take some photos with a tape measure in them of where the pipes are for future reference. So there’s a bit more work.
Great, the leak is fixed.
Except, obviously the shower can’t be used as is with open walls. So now it’s a matter of getting backerboard and putting that in, and sealing it. What I used is waterproof as it is, so we left it at that. And I say we, because for much of this product both the kids were helping with it. And quite honestly, that’s where this part of the project sat for months. The shower was usable, though a bit ugly.
But, we still had the basement to deal with. That meant ripping out the damaged sheetrock and studs that had rotted. That was fun. Not! For that I actually used a full respirator, body suit, and sprayed anti-fungal stuff liberally. Some of the water damage here was actually older than the bathroom leak and was due to poor grading and then more recently, runoff from the roof of my addition (a problem that gutters finally solved).
But hey, if we’re putting in new walls, might as well put in better insulation and if we can seal the old concrete (hint that went poorly) and oh, put in a couple of dimmable lights for a work area and some network jacks.
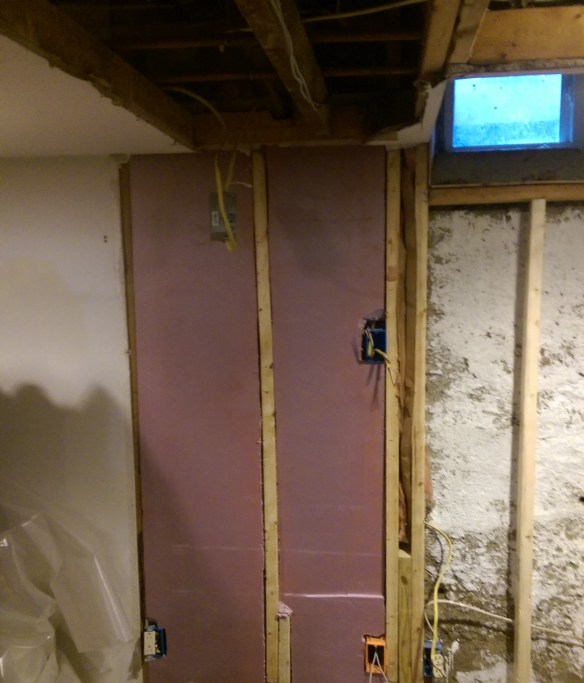
Basement wall in progress
Once that was all roughed in, it was time to at least sheetrock the walls.
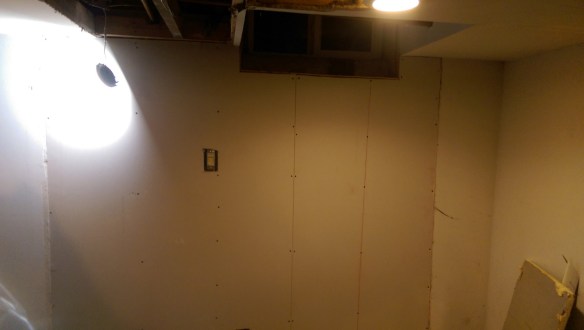
Sheetrocked walls
And that is basically where the basement project sat until yesterday. I’ll come back to that in a minute.
As for the bathroom, there was only so long I wanted to look at the backerboard. It was time to finally tile it. Oh, but before I could do that, I had to put that fan in. Besides finding just enough room in the outside wall between the framing for the 2nd floor and the window and other vagaries, it just fit. Of course that was just 1/2 the battle. The other 1/2 was then wiring up the switch. Oh and while I’m at it, might as well run a circuit for a GFCI outlet since the bathroom was lacking one. Once all that was done, THEN, I could tile.
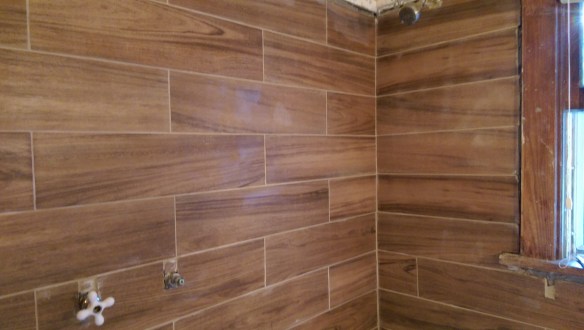
Tiled and Grouted
And yes, you may note the window does intrude into the shower space. Hey, I didn’t build the house! What you can’t see is the replaced trim on the top edge and left edge of the tile that my daughter literally spent hours sanding and resealing. It looks great.
Oh and I still have to find replacement cones for behind the handles! So that’s another thing to do for the project.
But back to the basement. The area in front of the wall has become my son’s de facto computer space when he’s home from college. It was ‘good enough’. But the ceiling still needed its sheetrock replaced and I needed to tape and paint the new wall. This has waited until now.
The problem with the ceiling is when I pulled down the old stuff, I didn’t have nice clean edges to butt the new sheetrock against. It was ragged where it had broken, or broke at awkward places so I couldn’t easily put in new sheetrock.
But I also took advantage of this time to reroute all my network drops so they will be hidden in the ceiling and come out nicely to my rack.
So yesterday, the kids did the dirty work of trimming the edges, cleaning stuff up, etc. It looks great and will make my job of sheetrocking much easier.
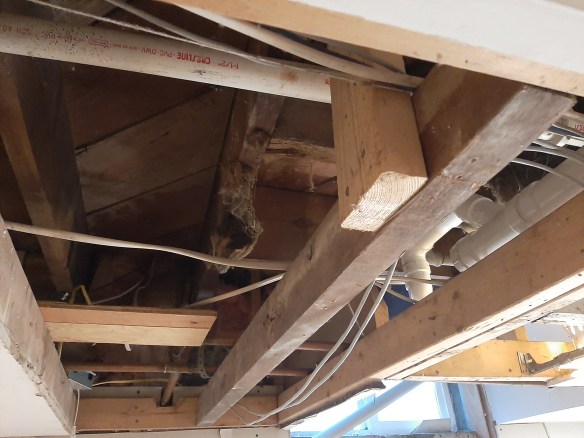
Open basement ceiling
By the way, I should note that the board you see sticking out is what I had used in the past when I had to slide in here to do some wiring or other work. This was sort of my own private Jefferies Tube. This should now be relatively easy to sheetrock, right?
Well, except for one small detail.
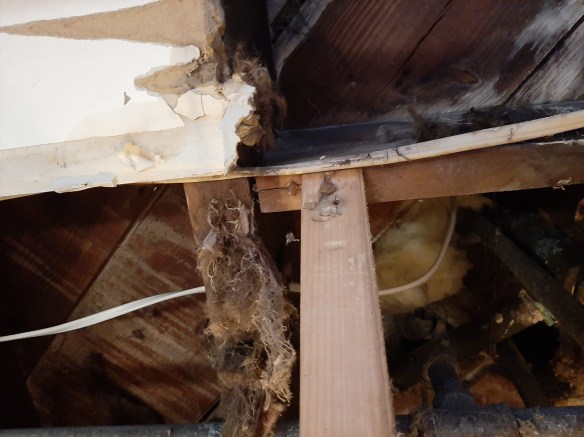
Houston, we have a problem.
Yes, that is a piece of electrical cable that was run OUTSIDE the studs and essentially between the join of where two pieces of sheetrock met at an inside corner. I absolutely HAVE to move this before I can sheetrock.
So that’s going to be a few more hours of work before I can even start to sheetrock. I have to identify which circuit this is, cut power, cut the wire, reroute it, put the ends in a junction box (which code says can’t be hidden!) and then make sure it’s safe.
After all that work, I can finally get around to sheetrocking the ceiling. Then I’ll have to mud and tape all the joints, sand, mud again, prime and then finally get the walls and ceiling painted.
But the good news is, the leak is fixed. That was the easy party!
Does this “simple” project of fixing a leak remind you of any projects at work? It does for me!

